Saturday, May 25, 2013

Everybody Loves Giant Robots

Finished up another prop for the sci-fi indie game I have doing some props for.  This one is a big one.


I worked from a concept that was provided for me.  I modeled, textured, and rigged this guy myself.  All images are rendered in UDK.


The basic idea is that it has 3 "tiers" that the player must fight against.  The mech remains stationary in a large room, confined by scaffolding and such, as it is still not completely built.  The room has several floors, and on each floor, the player would fight one tier of the boss.  


As you can see, this guy is pretty large.  This is a comparison of the mech next to some forklifts that are roughly human height.


There are several components on the body that open up to expose some glowy panels...these are the only weak points.  Here are some examples of them.  


These are some of the weapons that the mech uses to fight against you.  On top, there is a large AA cannon, on the sides, there are 4 laser cannons with 2 diodes on each.  There are also several smaller turrets scattered across the body.

Wednesday, March 13, 2013

An easy way to work with separate channels in a "combined texture"

Combined texture, Multitexture, RGB Texture, whatever you want to call it.

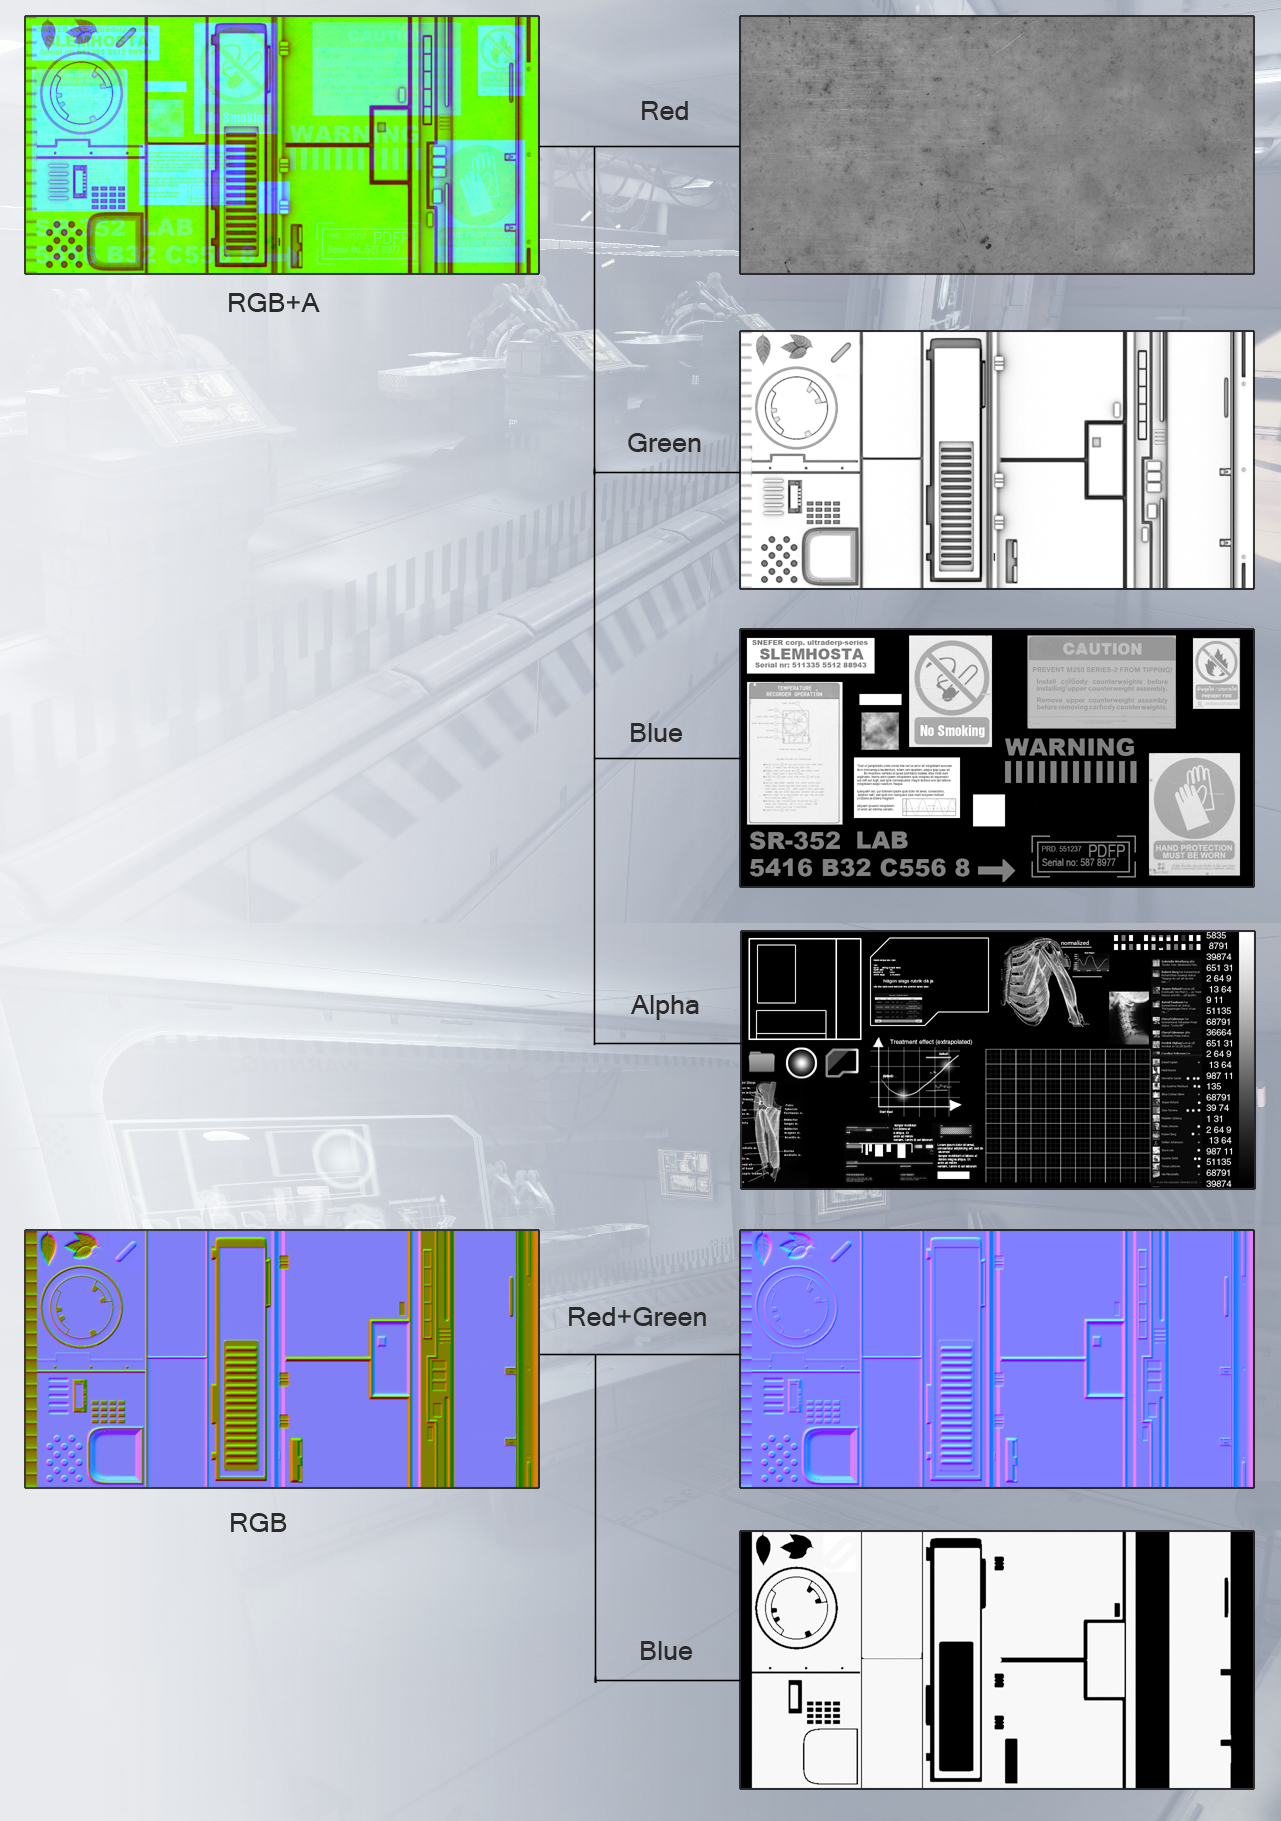
I'm referring to the process in which multiple greyscale textures are in the red, green, and blue channels of a single image file.  People have been doing this for a while, but lately it has been becoming an increasingly popular practice.

If your not sure what I'm talking about, here is a fairly recent, very popular example by Tor Frick.  This environment was made using a single diffuse and normal texture.  (Here is a breakdown of his textures.)


I have had several friends experimenting with putting multiple greyscale images into the channels of a single texture, but they get frustrated because they author these in a tedious way.  Usually by making one of the textures, then copy/pasting it into the individual channel..or creating the texture, then going into channels, and painting out the detail of the other channels.  If that isn't awkward enough, the process has to be redone anytime a change is made to any of the textures.


While it seems like a simple thing, I've seen enough people do it the hard way to warrant a simple tutorial showing how I work with these combined textures.


So what I'm going to do is use the Red, Green, and Blue channels to store greyscale values for Emissive, Specular, and Gloss:


This is how I have my layers set up in my Photoshop document:


So basically, I make a new group for the whole combined texture, then make a new sub-group for each of the 3 channels (R, G, and B).  Its also important to have a black background layer underneath these 3 sub-groups.  This acts as a constant value of zero, so any pixels without a value added in any of your layers will default to black.


Next, we change the blending options for the three groups.  You can either double click on the folder icon, or click the layer styles button at the bottom of the layers tab and select blending options (the button says "fx".).


In the Layer Style dialog, under the Advanced Blending section, there are 3 checkboxes for R,G,and B (highlighted above).  Set it so each group only has one channel box checked...the one that corresponds to the channel you are putting it in.

Now, your 3 textures are combining together correctly..so, while your texture might look funky (like the combined texture in the first image), looking in your channels tab...you can see that each individual channel is holding a separate greyscale texture!


So now that this works, you can tweak the textures within these groups instead of having to regrab the texture and drop it into the correct channel.

When going back to edit the textures, its easier to work in black and white...so you could turn all the channels back on for the group your working on, then turn them back off when your finished...but I have a neat little trick to make this easier.


Above the three color groups, I added a Black & White adjustment layer.  The values wont be completely accurate when you first use the layer...everything will appear darker.  Go into the adjustment layer's properties (double click the adjustment layer icon) and change the present to Neutral Density.  This will give a more accurate result.  With the adjustment layer visible, your groups will appear black and white again, so you can work on your textures, then just hide the adjustment layer when you are finished.

I like to keep this layer in my document and keep it hidden just in case I need to tweak my textures in the future.


And thats how I like to work with combined textures.  Its a pretty simple process, but one that a surprising amount of people don't know about, so I hope this helps make it easier for people to work with these types of textures.

Sunday, March 3, 2013

Another Mobile Environment for From Beneath

Just finished up another level for the mobile game I've been working on.

I did not make the vehicles...they were provided for me, but they were each on a separate texture sheet, so I had to combine the textures and re-UV map them.

The top 2 images are viewport screengrabs from Unity3d, the rest are screenshots from the game running on a Nexus 7 tablet.


Saturday, February 23, 2013

"From Beneath" Android game environments

I figured I'd throw up some images from a project I've been working on in my spare time for quite a while.

I've been working on some environments for a 3rd person shooter/horror style Indie mobile game.  Currently we are only focused on working with Android devices.

Ive been having a lot of fun with this, since its so easy to make builds and send them to a device to test your work in.  I've never really done mobile work like this before...so its been a fun learning experience.  I've had to really get to grips on the best ways to make a level look really nice while having as small of a performance footprint as possible.  Most of my environment work is required to be under 20 draw calls, so taking advantage of occlusion, static batching, and texture atlases has been key.


Below are a few screenshots taken from a few levels of the game.


Sunday, December 2, 2012

Another quick scifi prop - Superspindle

Another Scifi Prop here...supposed to be a more beefy version of the powerspindle I posted recently.  I started this very early this morning and finished it up in the same night.  For the normal map, only large forms were baked, the rest was all done with nDo2.


Tuesday, November 27, 2012

dDo beta test

soo....dDo beta is out in the wild!!!


I had to grab it and play with it right away.

I'm very impressed so far.


Here is a quick test that I did:


Coincidentally, this is the first prop I made while learning how to use nDo as well.

Basically, I input my low poly model (has to be .obj format) and an AO and Normal map.  Then, chose my presets, then dDo did its thing.  All I needed to do afterwards was tweak some of the grunge details with sliders.  This whole process only took me about 10 minutes.

I'll definitely be purchasing the freelancer license for this.

Monday, November 19, 2012

Another Unity Terrain - Lewis and Clark game

Heyyyyyy

I've been working on several different projects lately.  This is one of them.

I'm helping out on an another indie game.  This one is called Meriwether..its a game that follows the path of Lewis and Clark on their journey to the Pacific Ocean.

There is a lot of ground to cover (literally) so I'm working on some terrains for this.
I was not responsible for any of the assets in these images.  The trees/grass/etc.. were packages purchased from the asset store.  I sculpted the shape of the terrain, painted splat maps for textures, and placed trees and vegetation   I also made a few of the terrain textures and modified some provided ones so the colors matched better.

All images are screengrabs from Unity.  This is an on-going project, so these images are not final.


(Ooops, left the little viewcube in there :P)